How about this as a simple center stringer staircase idea?
I like that it takes advantage of the wall it runs against for additional support while still looking like a normal center stringer. And the railing is nice too.
I wonder if we could do the stringer with a curved steel beam. I wonder.
BTW, I found this pic on Apt. Therapy here.
An open dialogue between husband and wife about design decisions and, more generally, creating a home we can be proud of.
Friday, May 13, 2011
repairing fire damaged silo
The house is a silo constructed of 8 -inch wide, 2-inch thick, tongue and grooved staves which essentially form the structure of the house (i.e., there are no other framing elements holding up the walls of the house). So, one of the big concerns about repairing the fire damage to the exterior portions of the house was that removing staves to replace them could compromise the structural integrity of the house. therefore, our guy opted to scrape off fire damage and then re-inforce the damaged elements as much as possible. Here are some pix of how he repaired the most burnt section of the exterior - you can see where a couple pieces of the staves have been replaced with short sections of new wood - this is where the fire damage breached the hull.
Then a whole mess of screws held this thing tight in place.
Anyway, this was over the winter and all of this is now hidden beneath cedar siding, but it is fun to look back at how they fixed what a number of people said couldn't be done.
Then a whole mess of screws held this thing tight in place.
Anyway, this was over the winter and all of this is now hidden beneath cedar siding, but it is fun to look back at how they fixed what a number of people said couldn't be done.
Labels:
fire damage,
repairs,
round house,
silo house
Wednesday, May 11, 2011
design idea - subway tile in the kitchen
Good golly. This is just the thing we've been talking about: subway tile in the kitchen: either as a backsplash or to do the walls completely. And now here today is a feature on Apt Therapy about that very thing. Exciting. Take a look at the pix.
And here's another post with pix of subway tiled kitchens from The Fat Hydrangea.
Now, the thing that none of the pix in either of these posts shows is white subway tiled kitchen walls with a contrasting dark grout. There is nothing nastier than dirty grout and there seems to be no way at all to clean the stuff once it is determined to be filthy, so why not start with a darker color and avoid the issue altogether? Hygiene smygiene!! We're going to clean the walls the same regardless of color, so we might as well not advertise that they are permanently stained with a light colored grout.
Here we go (click the pix to enlarge):
This first one which is nearly perfect is from kitchenbacksplashes.blogspot.com:
And another from curbly.com - though not as dark a grout:
Another good one from an Apt Therapy post:
And this one is from HERE but it isn't really traditional subway tile:
Oh, hey, here are some good pix from Pink Wallpaper:
The real problem though is this: How do we install wide tiles on a curved wall? The tiles don't curve so the ends of the tiles will be right up against the wall while the middle part of each tile will stick out from the wall as an arc between the two end-points. Then, since you have to stagger the rows, the center of each tile will protrude a little over the seam between the two tiles above and below it. I suppose that with a large enough radius curve and 8" wide tiles it might not be so pronounced. Anyway, maybe we just test it out with a few tiles before we buy cases of them.
And here's another post with pix of subway tiled kitchens from The Fat Hydrangea.
Now, the thing that none of the pix in either of these posts shows is white subway tiled kitchen walls with a contrasting dark grout. There is nothing nastier than dirty grout and there seems to be no way at all to clean the stuff once it is determined to be filthy, so why not start with a darker color and avoid the issue altogether? Hygiene smygiene!! We're going to clean the walls the same regardless of color, so we might as well not advertise that they are permanently stained with a light colored grout.
Here we go (click the pix to enlarge):
This first one which is nearly perfect is from kitchenbacksplashes.blogspot.com:
And another from curbly.com - though not as dark a grout:
Another good one from an Apt Therapy post:
And this one is from HERE but it isn't really traditional subway tile:
Oh, hey, here are some good pix from Pink Wallpaper:
The real problem though is this: How do we install wide tiles on a curved wall? The tiles don't curve so the ends of the tiles will be right up against the wall while the middle part of each tile will stick out from the wall as an arc between the two end-points. Then, since you have to stagger the rows, the center of each tile will protrude a little over the seam between the two tiles above and below it. I suppose that with a large enough radius curve and 8" wide tiles it might not be so pronounced. Anyway, maybe we just test it out with a few tiles before we buy cases of them.
Tuesday, May 10, 2011
design idea - hardwood walls in master bath
I was walking home from the subway last evening and I passed a dumpster full of this nearly new 4" x 3/4" hard maple t&g flooring (prefinished and micro-bevel) that somone had just savagely uninstalled.
Judging by the amount of dried adhesive on the bottom of the boards and the total absence of nails, it had been installed on a concrete floor before someone bored of it. Anyway, I thought about it for the next 4 blocks and when I got home I changed into my dumpster diving garb, grabbed my gloves, and gave up a great parking space to drive back to the dumpster.
I loaded probably 150 square feet of boards averaging 2' to 4' long into my car and zipped home to find the space I had vacated still waiting for me.
Anyway, I don't really know what I'm going to do with the stuff. It isn't enough to do any of our floors and it would be impossible to get the adhesive off the bottom to ensure a tight and creak-less fit to plywood subflooring. I am thinking it might make nice wall panelling in the master bathroom though, mounted vertically along the curved wall.
So here are some pix of flooring used for walls. Mostly I hate the look - but there are a few that look great and those are the ones that inspire.
Here is the only one that actually comes close to what I am thinking - although I would only come up to about wainscoting height:
1
And then there are ceilings made of wood paneling. I really like this next one.
17 -
Judging by the amount of dried adhesive on the bottom of the boards and the total absence of nails, it had been installed on a concrete floor before someone bored of it. Anyway, I thought about it for the next 4 blocks and when I got home I changed into my dumpster diving garb, grabbed my gloves, and gave up a great parking space to drive back to the dumpster.
I loaded probably 150 square feet of boards averaging 2' to 4' long into my car and zipped home to find the space I had vacated still waiting for me.
Anyway, I don't really know what I'm going to do with the stuff. It isn't enough to do any of our floors and it would be impossible to get the adhesive off the bottom to ensure a tight and creak-less fit to plywood subflooring. I am thinking it might make nice wall panelling in the master bathroom though, mounted vertically along the curved wall.
So here are some pix of flooring used for walls. Mostly I hate the look - but there are a few that look great and those are the ones that inspire.
Here is the only one that actually comes close to what I am thinking - although I would only come up to about wainscoting height:
1
![]() |
| 2 - I hate this look. |
![]() |
| 3 - The ceiling truss-work and iron elements are cool, but too much warm warm wood. |
![]() |
| 6 - Horizontal is so much less interesting - it just looks like a sauna. |
![]() |
| 8 - NO! |
![]() |
| 9 - No. |
![]() |
| 10 - Ugh. |
| 12 - Horrible waste of pretty wood. Looks like a bad bad motel. |
![]() |
| 13 - This horizontal wood over the bed is pretty cool. |
| ||
| 16 - Cool, but looks like it would get horribly dusty and cobwebby and then be impossible to clean. |
Monday, May 9, 2011
design idea - reclaimed milk painted wainscoting
How about some vertical reclaimed wainscoting for the kitchen walls? This stuff (pictured below) is listed on CL for $8 a square foot (ouch!). But I really like the way the milk paint cracked over the years. Those colors are so like frescos. So, this batch is out of the question, but now I know to keep my eyes open for this stuff when anything in the neighborhood is being gutted.
Labels:
milk paint,
reclaimed lumber,
reclaimed wood,
wainscoting
Sunday, May 8, 2011
design idea - chandelier pulley
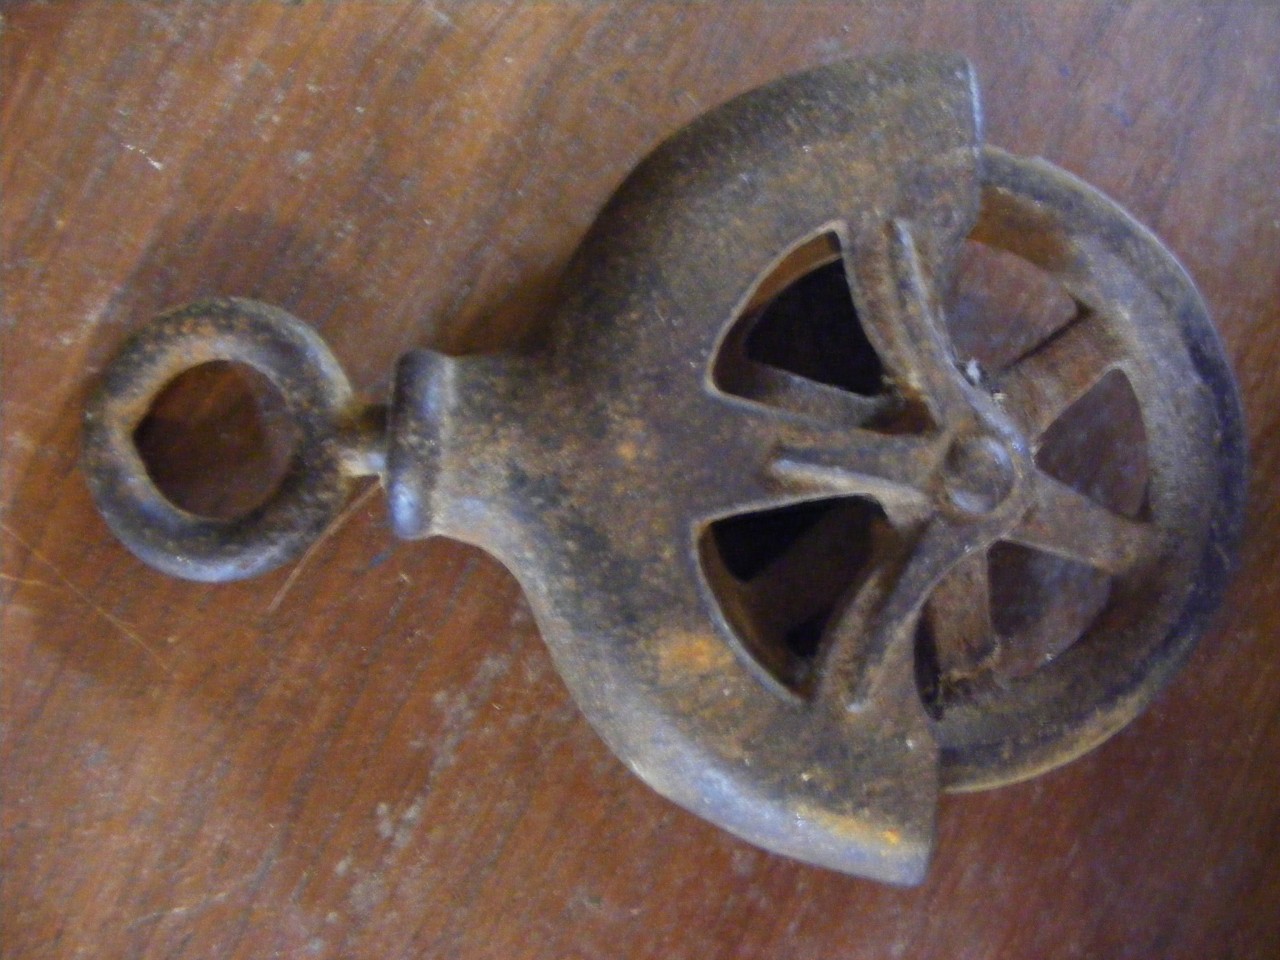
Once I finish the big, dark, industrial chandelier, I am going to need to suspend it from the ceiling. I know I haven't begun work on the chandelier yet, but it is never too early to begin imagining how it will be suspended. My thought has been to run a chain or rope or cable through a big pulley mounted to the ceiling. But which pulley?
There are so many lovely old pulleys of roughly the same vintage as the dumbwaiter pulley that I am using as the heart of the chandelier. Below are some samples I found quickly on the internet. Note that a good many of them are made by the same company, Myers, that made the barn door roller-pulleys we got to carry the interior door from the box to the tube. So check them out (click on the pix to enlarge):


There are so many lovely old pulleys of roughly the same vintage as the dumbwaiter pulley that I am using as the heart of the chandelier. Below are some samples I found quickly on the internet. Note that a good many of them are made by the same company, Myers, that made the barn door roller-pulleys we got to carry the interior door from the box to the tube. So check them out (click on the pix to enlarge):


Subscribe to:
Posts (Atom)